ElementFe is my trade name for the Guemes Island blacksmith shop; designing, forging, and building handcrafted forged steel and iron furniture, gates, railings, candlesticks, spoons, kitchenware and all manner of repair and fabrication.

Monday, December 29, 2008


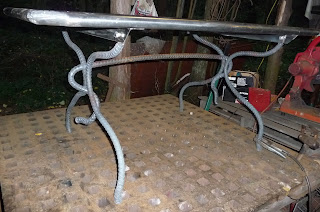
The Green Table gets remade.
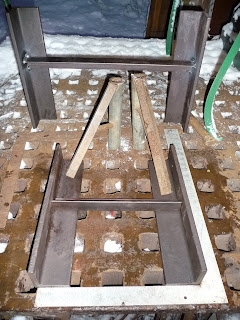
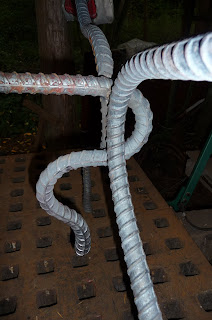
It was too wiggly, and too tall, so I took 3" off of each leg, and installed braces at the corners and between braces on the horizontal bars.
Round bar such as rebar has very little resistance to bending, unlike angle iron or square tube, both of which I use frequently when building furniture, so it's neccesary to design for extra stiffness.

So.
NEVER ADJUST THE TREE WHEN THERE ARE BOTTLES INSTALLED!
I was installing a new one for my wife, and thought I'd stomp it down just a little bit firmer in the ground...the bottles bounced on the metal posts, and I found myself in a shower of broken glass.
Since it was cold and I was wearing heavy clothing, no damage was done, but it really got my attention!

Friday, December 26, 2008


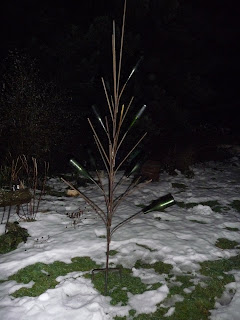
Today's project is one that several people have asked me about: a bottle tree.
This is a custom in the South, whether it's a welded piece of fantasy or just bottles stuck on the branches of a dead tree.
Materials for this one (what I had on hand on a day too snowy to shop for more steel): 6.5 feet of 5/8 rebar, and about thirty two feet of 3/8 rebar, plus a wicked sharpened cleat that you can step on to drive it into the ground, this makes for a steadier base.
Installed height will be 8 feet, with room for 24 colored bottles.

Wednesday, December 24, 2008


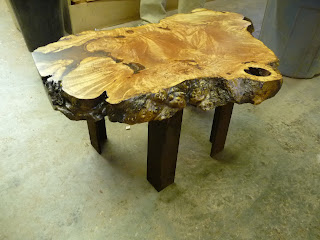
The table base begun in the previous post is done, delivered, and paid for.

The holes are drilled and the rivets set, first they are heated with OxyAcetylene torch, then while still glowing hammered to shape.
The last piece to be cut and drilled is for the tops of each leg, so that a heavy screw can be put into the bottom surface of the maple burl table top.
Finally, the finished base with our cat (who apparently sees herself as a feline Vanna) helping.

Tuesday, December 23, 2008


More on the table base- First the pieces are cut to length, then they are heated to just a few hundred degrees in the propane furnace (could be done in an oven- burning wax smoke in the kitchen, anyone? ....didn't think so.)
The wax is brushed on, saturating the porous surface and giving the steel a lovely black/brown finish that is much more even and tougher than a plain rubbing of wax.
I cheated, tack welding these together before installing the rivets, since there is only a finite budget for this project.
Oh- the randome photo of the green table frame is another current project: made to fit a slate top, the customer asked me to lower it a couple inches- more on that to come.

Wednesday, December 17, 2008


Once or twice a winter we get a week of what most folks would call "winter"- snow, lows in the twenties.
Not a whole lot going on in the Forge today, but here are a couple of little projects...
These spoons weren't getting much love at shows, though I was kind of fond of the unfinished look, understandably my customers weren't so excited about having them in their kitchens. Heating, straightening the handles, and forging a hook on the end (by pinching and stretching the extra metal at the end of the handle) made for a much more appealing product.
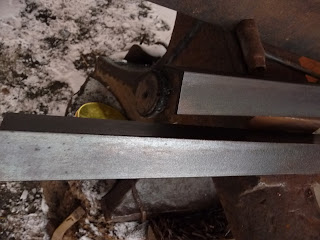
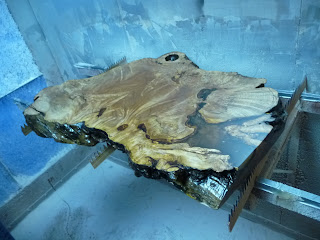
Heavy angle iron (3" x 3/8" ) is being cut for a table base- this piece of burl wood sat for many years in the shop at Mitercraft ( www.mitercraft.com ) an island woodworking business that employed my sons and continues to teach and employ young folks on Guemes Island.
It's being made into a tabletop for one of their first helpers, who started at 16 and now is married, successfully in the excavation business, and moving into his new home.
Since he's a digger and heavy equipment guy, I thought he might appreciate a sturdy base, and am hoping that the strong verticals and geometric look will set off the free form organic top...more to come on that!

Wednesday, December 10, 2008


Today's project was a firewood holder for a neighbor. They said, "Heck, we live in a barn, make it simple" but of course I had to add SOMETHING cute to it.
Dimensions- 3' wide, 4' tall.
1 1/4 and 1" steel tubing.
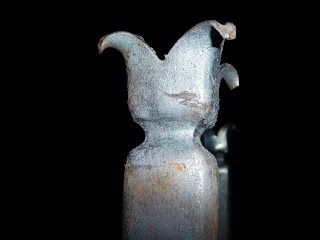
The flowers are made by cutting the ends of the tubing, heating it to a bright yellow and pinching the tube in a Guillotine Tool, then just bending the petals over the anvil horn.

Monday, December 08, 2008

Here's an experimental link to my new store at Etsy.com!
Check it out and tell me what you think!

Monday, November 24, 2008


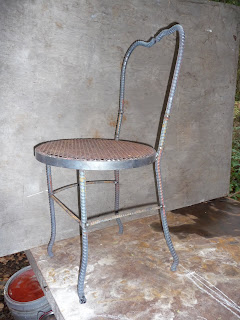
Here's a new chair that I built for fun- it's getting rave reviews for being comfortable, practical, and fun. A few finishing touches lacking in this photo, BTW

Friday, November 14, 2008


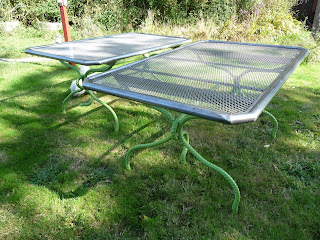
Prototyping for chairs to match the patio tables in the last post.
Here the legs are upset- blacksmith talk for heated and smashed to thicken the cross section. The bar loses about 2" during this process.
The seat is a new design, to use mesh for outdoor furniture and have a somewhat more rounded rim.
Here also is a semi-formed chair, a little smaller than the finished ones will be, just so I can get a look at how it's coming along.

Wednesday, October 08, 2008


Here they are, getting the final coat of wax!

Monday, October 06, 2008


The last step is paint- the bases get Zero Rust enamel, and the tops almost an entire quart of Permalac, in this case I brushed it on in order to get into all the cracks and crevices.

Saturday, October 04, 2008


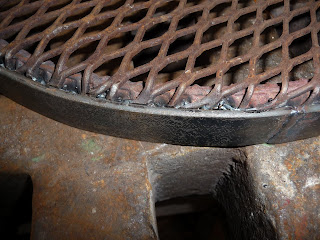
In order to have a clean looking top without a lot of welds showing (not an easy feat on an all-welded table) I put trim around the edge of the expanded metal top.

After fitting, it's welded in place from the back, and Voila! Ready for paint and lacquer.

The local auto paint guys left me a bit discouraged about clear finishes on steel, but sculptor friends spoke glowingly of Permalac- has a great track record and can even (if neccesary for a desired surface) be applied over patinas and rust.

Thursday, October 02, 2008


Finishing the tables, now they're almost ready for paint and lacquer.

Today I worked on the crossbar- photos show heating and upsetting the ends, then making the decorative bend on each end. Last step is to make a graceful curve in the middle and fine tune and weld it in place.