ElementFe is my trade name for the Guemes Island blacksmith shop; designing, forging, and building handcrafted forged steel and iron furniture, gates, railings, candlesticks, spoons, kitchenware and all manner of repair and fabrication.

Tuesday, March 25, 2008


Another day in the shop: As a new handrail is being laid out on an extension to the stake table and components forged and cut, I found time for a few little projects in between.
Below, Chainsaw chain becoming a billet for a kitchen knife.
Also, three new vases done as a warmup- still in the thirties, it's spring-Vember in NW Washington.
Social hour at ye Blacksmythe Shoppe, all pets welcome. Well, almost all.


Saturday, March 22, 2008


I thought it would be fun to show some of the many steps to getting a lovely red chair out of a pile of steel rods and bars and stacks of steel sheet.
First, the components are cut to length: two front legs,  pieces for the back legs and backrest, pieces to be bent for the seat hoop and foot 
rail, and sheet metal marked out and cut to rough size for the seat.
Then, bending is done. Shown is the back/leg piece being bent in the vise, using a simple bending fork with an extended handle.
I only cut one tree when I built the shop, and my main vise is attached to the stump. Douglas fir stumps last pretty long- I've even seen stumps a foot across and larger completely healed over with scar tissue after being logged. Tremendous vitality.


The most time-consuming part is the seat.
First, a hoop is made from 1/4 x 1 1/4" hot rolled flat bar.
The hoop is trued up in a form and on a mandrel, by many many hammer blows.
Then, I tack weld it with my wire feed welder turned down low, to a sheet of 18 gauge.
With hoop attached, the shear is used to trim to size, then it's all ground precisely even.
All surfaces have to be very clean and shiny, because the next process, TIG welding, isn't so forgiving of contamination as some. It's important, too, to have a very nice weld where the thin sheet metal joins the rim. This weld is done without added filler metal, so that the rim of the seat is somewhat rounded. Photo at top of post...
(apologies for the photos being out of order- the learning curve, dontcha know)


Major assembly on the simple jig. The crosspiece holds the seat at the proper height and with just a bit of slope toward the back. There are stops welded to the base plate and cross bar to position the legs, so I can pretty much stick 'em in place and tack em on. 
The back slats are then angle cut, shaped for comfort, and welded in place. Then the welds are 
rough ground for smoothness and assembly is finished.
After a thorough grinding and cleanup, here they are with a first coat of Ben Moore's Ruby Red oil base enamel. They will be delivered to a home on Orcas Island, one of our neighbors in the archipelago.My client had seen some work done at Adrift Cafe in Anacortes, WA and, doing all the consulting and business via email,  commissioned this set based on the Red Chair from my website, www.elementfe.com

Thursday, March 06, 2008


Here a ladle evolves- beginning with 1 1/2 " pure iron, which holds heat SO much better than steel- I can actually work it under the mechanical hammer down into a black heat (though it's not the greatest idea).
The objective is to set up the shape at the end of the bar so that squishing it naturally makes a round disk for the spoon, which is then sunk into a mold.
All different, just now I'm into making nice clean stems and bowls but leaving the ends of the handles very "forged". It's different every session it seems.


Tuesday, March 04, 2008


However, the 8" vise still has a much harder bite than the "1-ton" press- go figure...
Now, the lip gets annealed (softened by reheating) and bent down where it rests on the sink, and the corners welded with my primitive "scratch start" TIG setup, and with a little cleanup it's
finished.

I thought it was worth the time to modify the 1-ton press to accept the 6" bending jig- it's not a brake, by any means, but it sure has gotten me through a lot of work, and it's so much faster than twisting a vise, which is what these jigs were made for.

It was a little hard to reach, though,  and this was fairly heavy stock, so I stretched the handle just a bit...as Guy Clark would say, "Sometimes I use my head sometimes I get a bigger hammer". 
In this case I kinda did both.


Here's the process for making a drain tray for my nephew's utility sink in his goat barn.
Fortunately, with the price of Gold-Oops, I meant to say stainless steel- these days, I had a sheet left over from another job.


We started production today on dining room chairs, similar to the Red Chair featured on the ElementFe.com website. Here is a photo of the prototype, and a pile of stock Isaac cut after school for the first ten.

Monday, March 03, 2008


But wait!
The spreading tool keeps breaking where the working part is welded to the handle.
The right way to make these is to take some good steel and just make it from one piece- no welds to break! So into the fire goes a chunk of 5/8" 1045, alongside the trowels.
And here they are, and this afternoon is done! Ready for handles and several lifetimes of work in the garden.


OK, back to the trowels.
The blade is ground to just the shape and cleaned up, then back in the fire to finish the tang and curve the blade.


Oh- and I need a couple rings for the top of bells that I'm making from old dive tanks...these are forge welded- you can tell from the little nub that's left if you're not into hiding it- it's actually quicker than taking it over to the electric welder, with a little practice.


The flattened part is trimmed with a shear to the proper shape- Voila!
But wait! What's that leaning against the propane forge?
Looks like a section of high carbon cable...the end is fluxed and welded, first, then clamped in a vise and when yellow hot twisted as tight as I can get the first foot or so.
Then the tightened part is fluxed and welded into a square billet, which will make a beautiful blade!


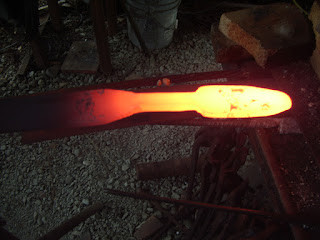
The blade is being spread (actually using the mechanical hammer) bit by bit until it has a uniform thickness suitable for a garden trowel.


An afternoon in the forge.
This post shows some of the many operations that take place during a typical afternoon in the forge. I thought it would be fun to get out the mini-camera and document some of this as it happens.
Not shown is the office work that was going on between shop operations- drawings for a new rail for an old customer, many phone calls and emails to keep up on accounts.

One project for the day was garden tools.
Starting with surplus automotive springs...

A single leaf is cut loose from the stack. Often the eye is used for hinges and such, in this case I heated it and flattened it out.

These were cut to a point, but the technique shown makes that unneccesary, since they get sheared to shape after being spread.